Coming Soon

Luciano Clementi
Video Editing // Motion Design // Front-End Development // 3D Modelling
Let’s Work TogetherHi!
I'm Luciano Clementi, and I've always been drawn to the process of creating something from nothing. What started as a personal interest has grown into a committed pursuit. I realised how much I enjoyed influencing emotion, rhythm, and story through video editing which has led me into front and back end development and interactive design.
I'm currently studying Interactive Media Design at Fanshawe College, working toward graduating in April 2026. During this chapter of my career I have developed strong skills accross both visual and technical practices, allowing me to create comfortably between motion, design, and code. I enjoy tackling creative-direction challenges and shaping projects that are purposeful, enaging, and visually appealing.
My goal is to take on remote friendly work that requires motion and front end development, collaborating with teams who value the creative process and enjoy working together to build impactful content.

Projects
Cartoon Bumper
3D designed Cartoon bumper clip.
Nickelodeon “Rugrats” 3D Bumper
College Assignment – Interactive Media Design, Fanshawe
College
Duration: 18.5 seconds
Tools: Cinema 4D, Redshift, After Effects
Project Overview
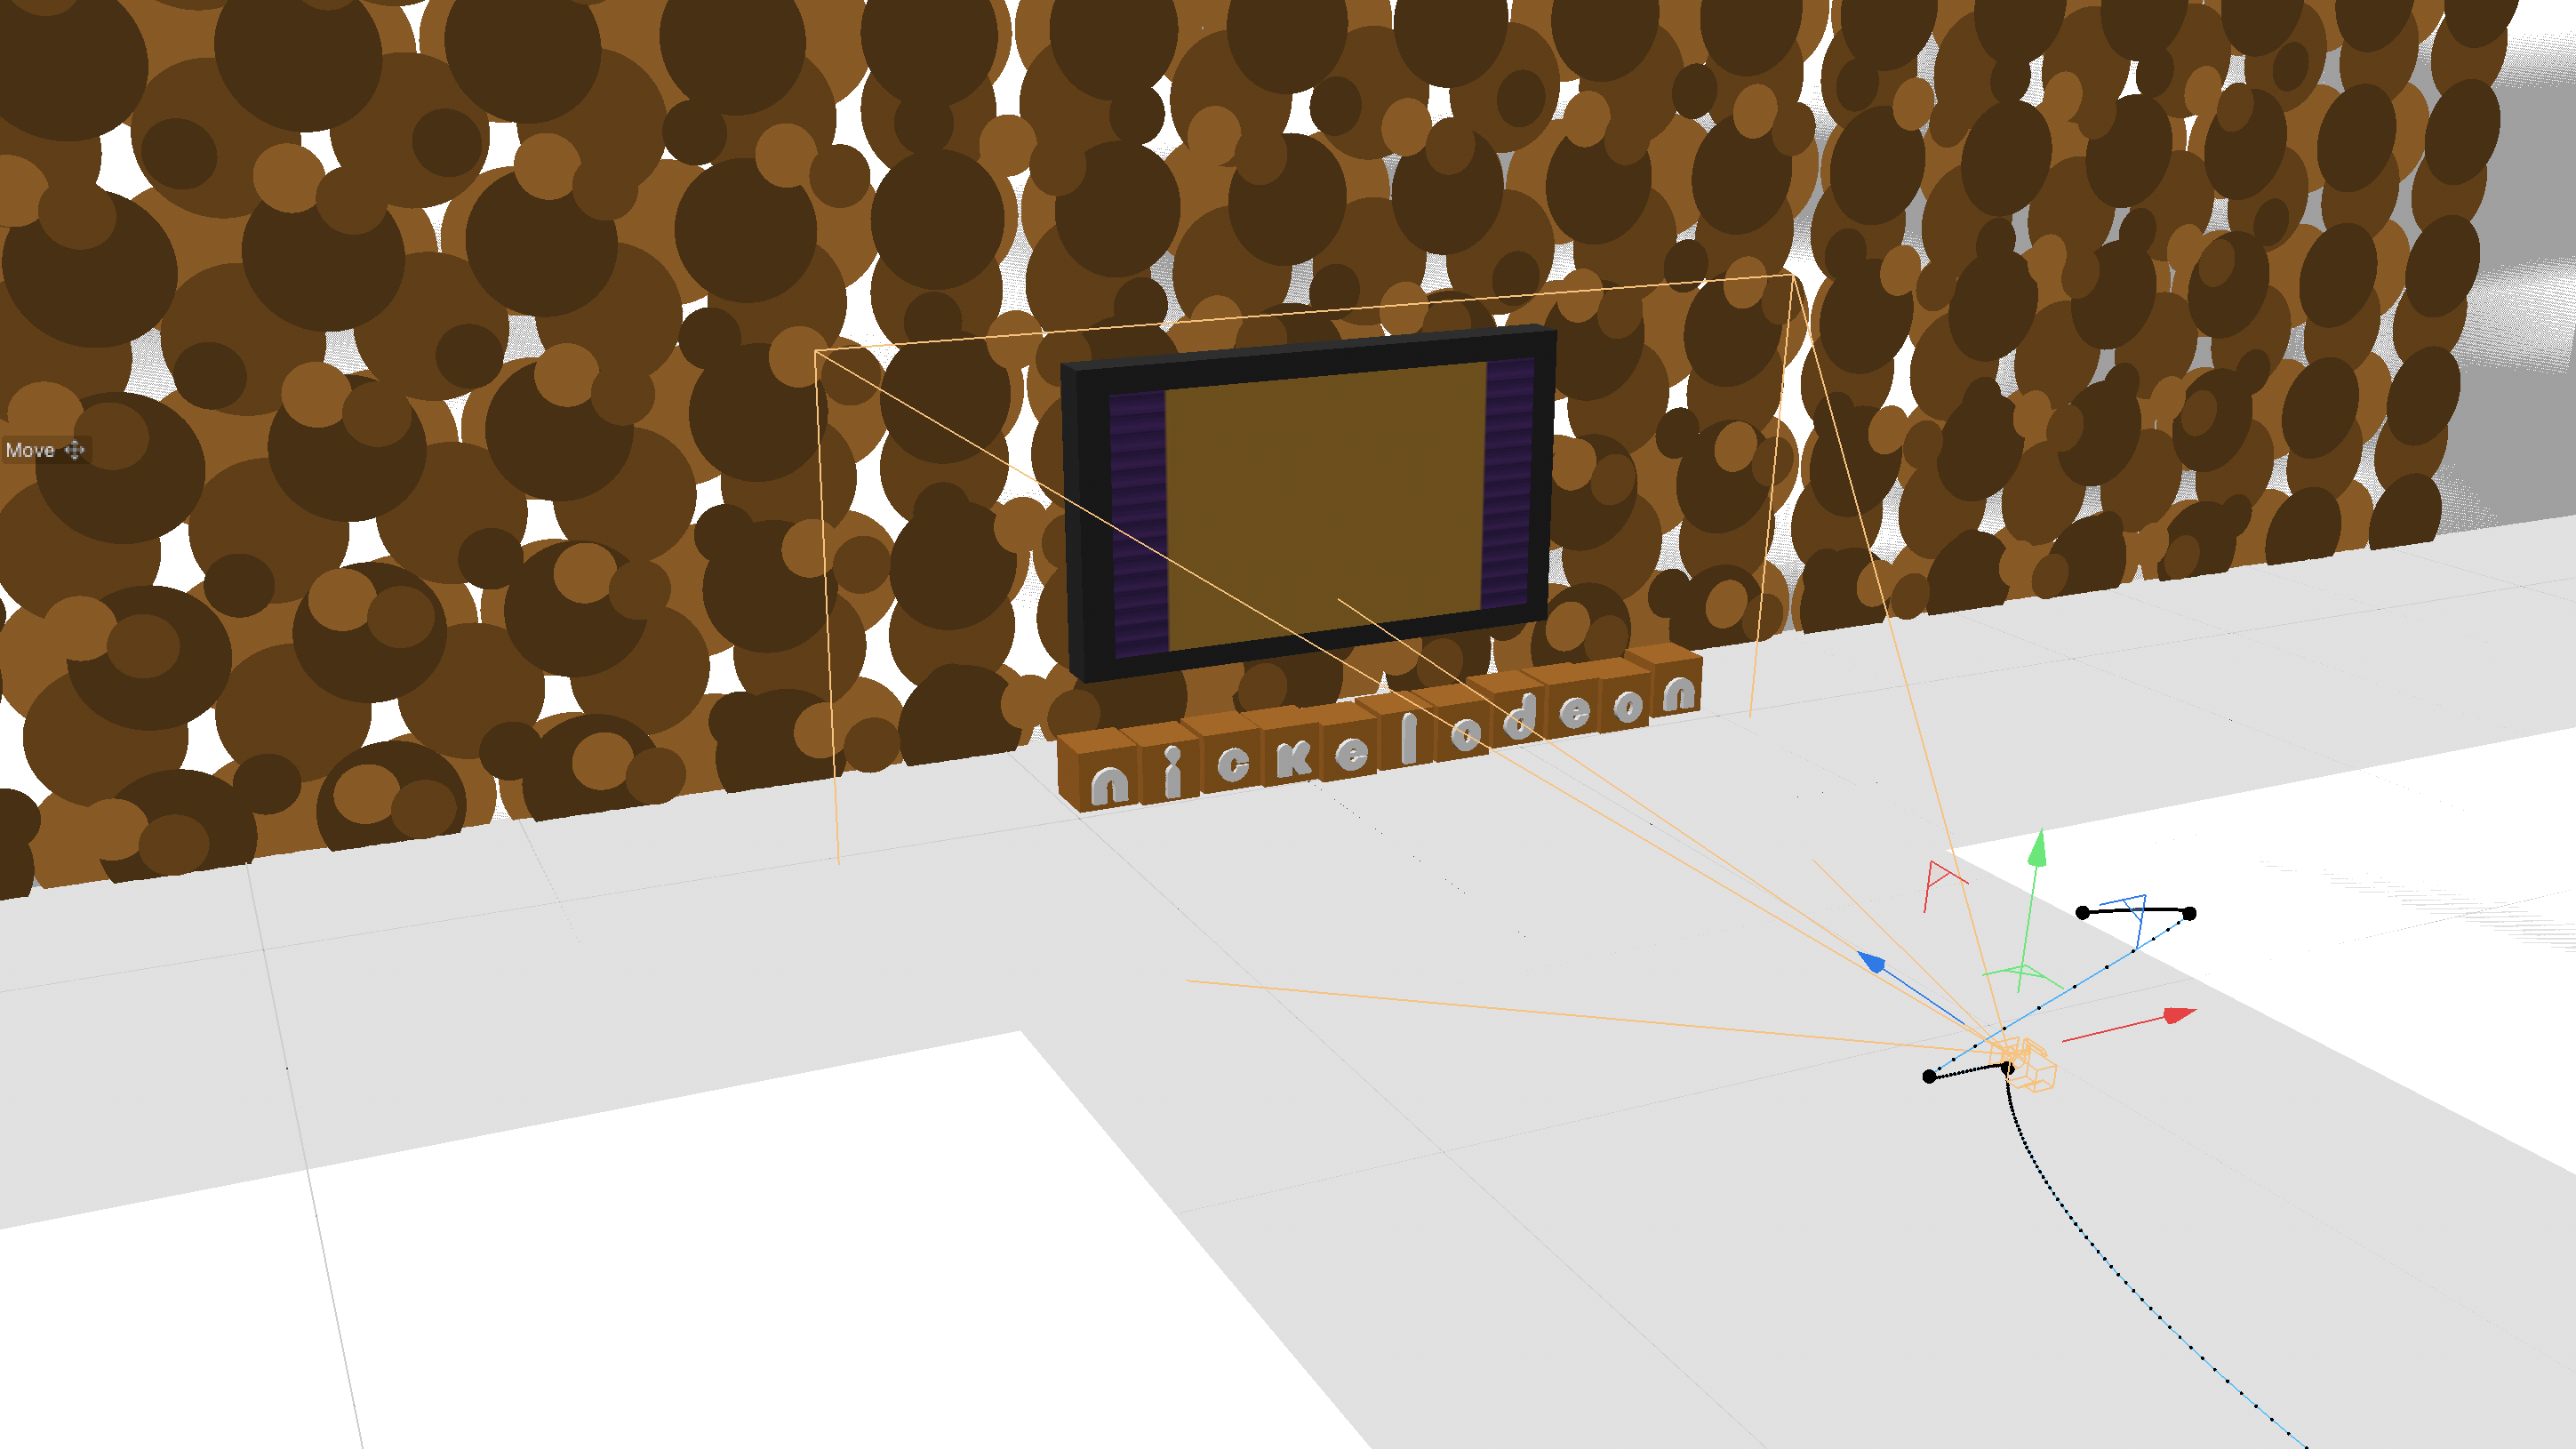
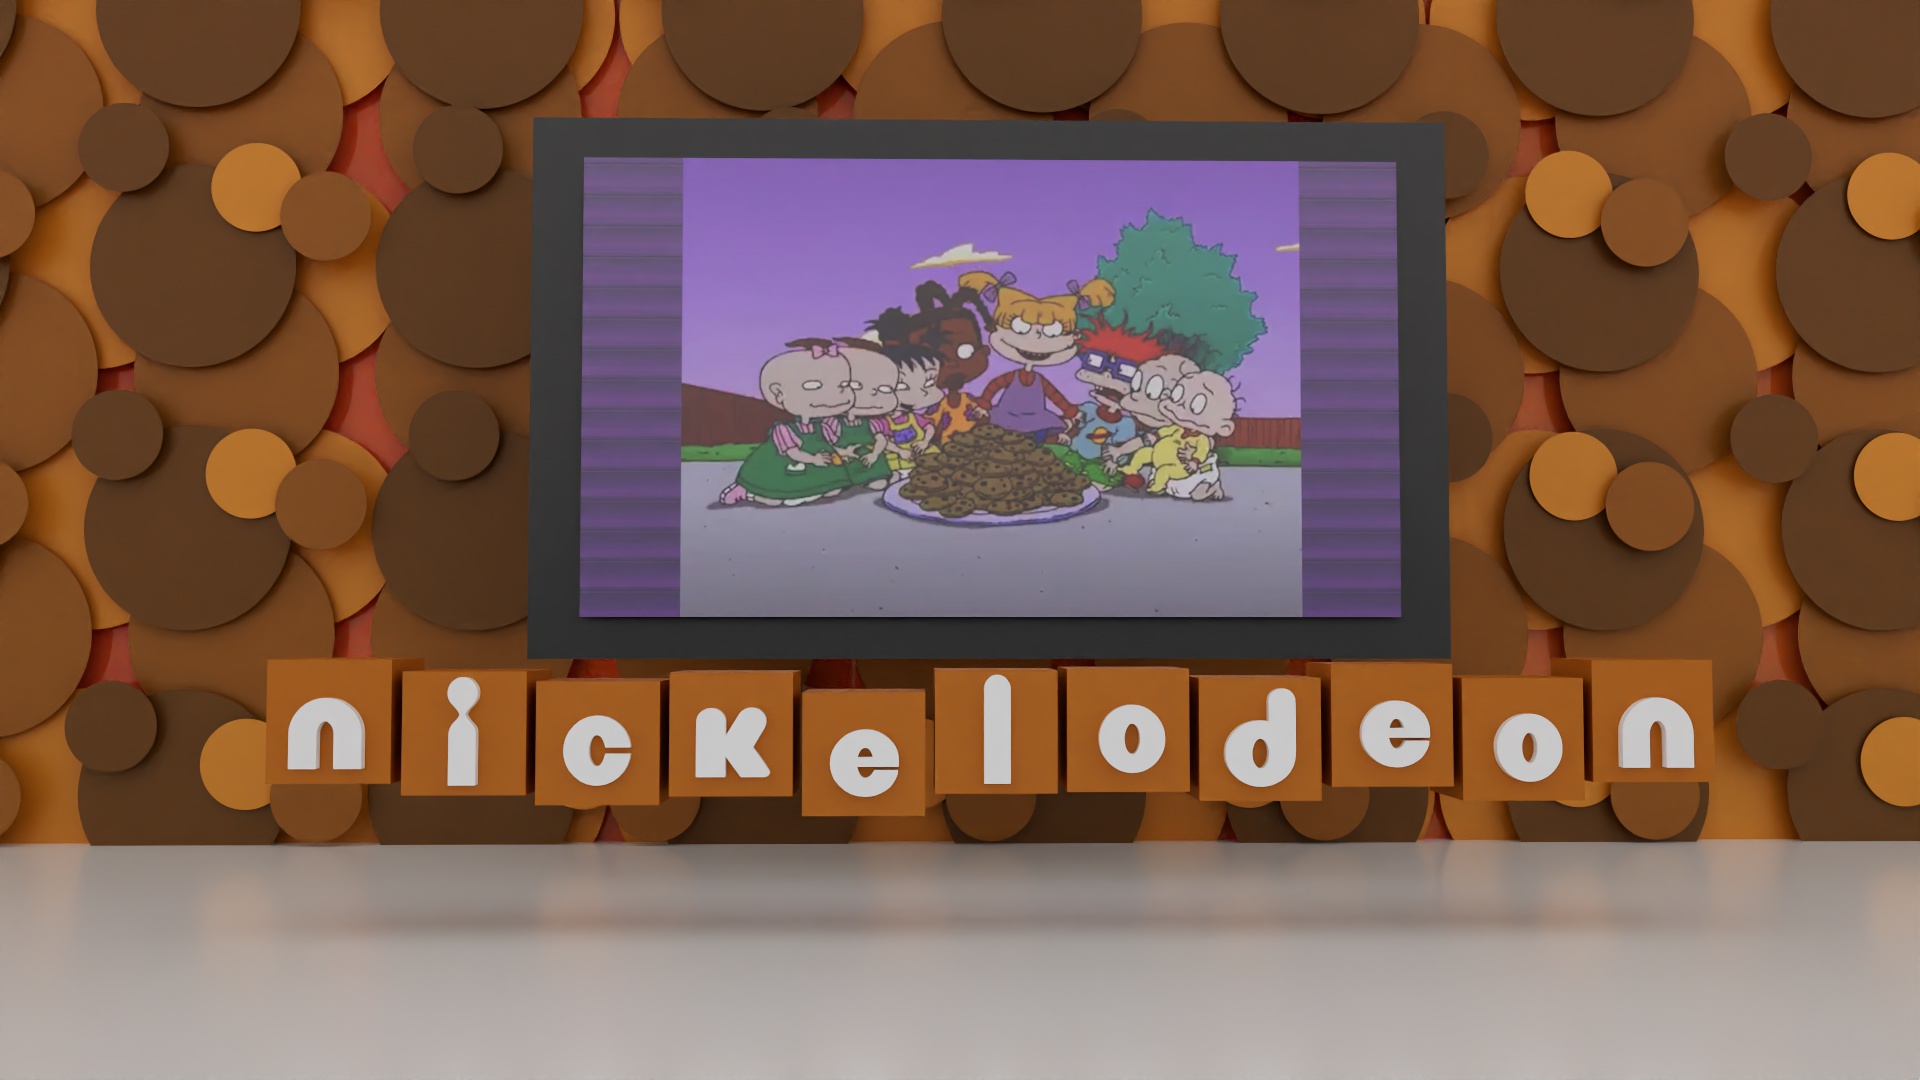
This 18.5-second animated bumper was created as part of a college assignment in the Interactive Media Design program at Fanshawe College. The objective was to design a playful cartoon-themed animation using Cinema 4D and After Effects.
I chose to reinterpret Nickelodeon branding by creating a stylized 3D Rugrats-themed scene that captures the energetic and chaotic feel of classic Nickelodeon visuals while showcasing my motion timing and environment-building skills.
Concept & Creative Direction
The concept was inspired by the bold, playful identity of Nickelodeon. I designed a Tetris-inspired environment where block-like forms animate to replicate tetris gameplay, revealing the Nickelodeon name in a stylized 3D layout while Rugrats footage plays on a screen within the scene.
- A decorative patterned wall with playful circular shapes
- Floating block elements inspired by Tetris squares
- Nickelodeon’s signature orange and complementary shades of brown, yellow, and purple
- A dynamic camera move that pushes forward and tilts upward to reveal the full composition
The goal was to create a sense of motion and anticipation, guiding the viewer through the space before revealing the final animated title.
Technical Execution
All models were created from scratch in Cinema 4D. The animation was built entirely using keyframes and motion modifiers, with careful refinement in the graph editor to control timing, easing, and acceleration.
The camera follows a determined path, moving through the scene to create depth and cinematic flow. One of the technical elements involved mapping video footage onto a 3D object to simulate Rugrats content playing on a screen within the environment.
Lighting was achieved using multiple spotlights positioned at different distances and angles to illuminate the environment and emphasize preferred areas.
Rendering was completed in Redshift, and the final title animation polish was completed in After Effects.
Challenges & Problem Solving
The primary challenge was render performance and output consistency. Initial render times reached approximately two minutes per frame, leading to overnight render sessions totaling nearly ten hours. The first full render export resulted in incorrect colour output, requiring the entire sequence to be rendered again.
To address performance issues, I researched optimization techniques to reduce render time while maintaining acceptable visual quality. I experimented with render settings and sampling adjustments to improve efficiency.
This experience reinforced the importance of verifying render settings and testing output before committing to long final renders.
Workflow
- Concept development and scene idea (Tetris-inspired layout)
- Modeling core environment and block elements
- Keyframe animation and camera path development
- Lighting refinement
- Test renders and render optimization
- Final render and compositing adjustments
The project took approximately 20 production hours, excluding render time. I performed frequent test renders throughout production to check motion, lighting, and performance before final output.
Skills Demonstrated
- Keyframe animation and motion timing
- Camera path animation in 3D space
- Graph editor refinement for smooth acceleration and easing
- Environment building in Cinema 4D
- Video texture mapping in 3D
- Basic render optimization workflow
- Brand-inspired visual development
Reflection
This project strengthened my understanding of motion timing, camera movement, and environment creation in 3D space. It also introduced me to real-world rendering challenges and the importance of workflow efficiency.
If revisiting the project, I would refine the lighting for greater contrast and depth and introduce more layered animation elements to increase the visual energy and better capture the chaotic tone associated with classic Nickelodeon branding.
London Aviation Museum
Atmospheric looping video for museum and presentation use.
London Aviation Museum Looping Video
College Assignment – Interactive Media Design, Fanshawe
College
Duration: 2 minutes 37 seconds
Tools: Premiere Pro, After Effects, Adobe Illustrator
Project Overview
This looping video was created as part of a group assignment focused on redesigning the London Aviation Museum’s digital presence.
My role was flexible within the team, and I was responsible for creating the looping video used for background display in museum settings.
The video uses archival footage from a historical documentary about World War 2 training facilities in London, Ontario, aiming to tell a subtle story while paying respect to those who served.
Concept & Creative Direction
The video was designed to feel calm and immersive, using slow pacing and no audio to support continuous looping.
- Slow cinematic pacing
- Atmospheric visual focus
- Respectful tone
- Seamless looping
Process & Execution
I selected and arranged archival clips to create a consistent flow.
I stabilized footage using tracking tools and adjusted colour in After Effects to improve brightness.
The logo animation was created using Illustrator assets with keyframes and trim paths.
Challenges
Some clips had heavy camera shake, requiring stabilization.
Multiple logo revisions required rebuilding the animation several times.
Outcome & Reflection
The final video maintains a consistent tone and subtle storytelling.
I improved efficiency, stabilization techniques, and Illustrator animation workflows.
Anti-Vaping Awareness Campaign
Teen-focused anti-vaping awareness campaign.
Anti-Vaping Awareness Campaign
College Assignment – Interactive Media Design, Fanshawe
College
Tools: Premiere Pro, After Effects, Adobe Illustrator
Project Overview
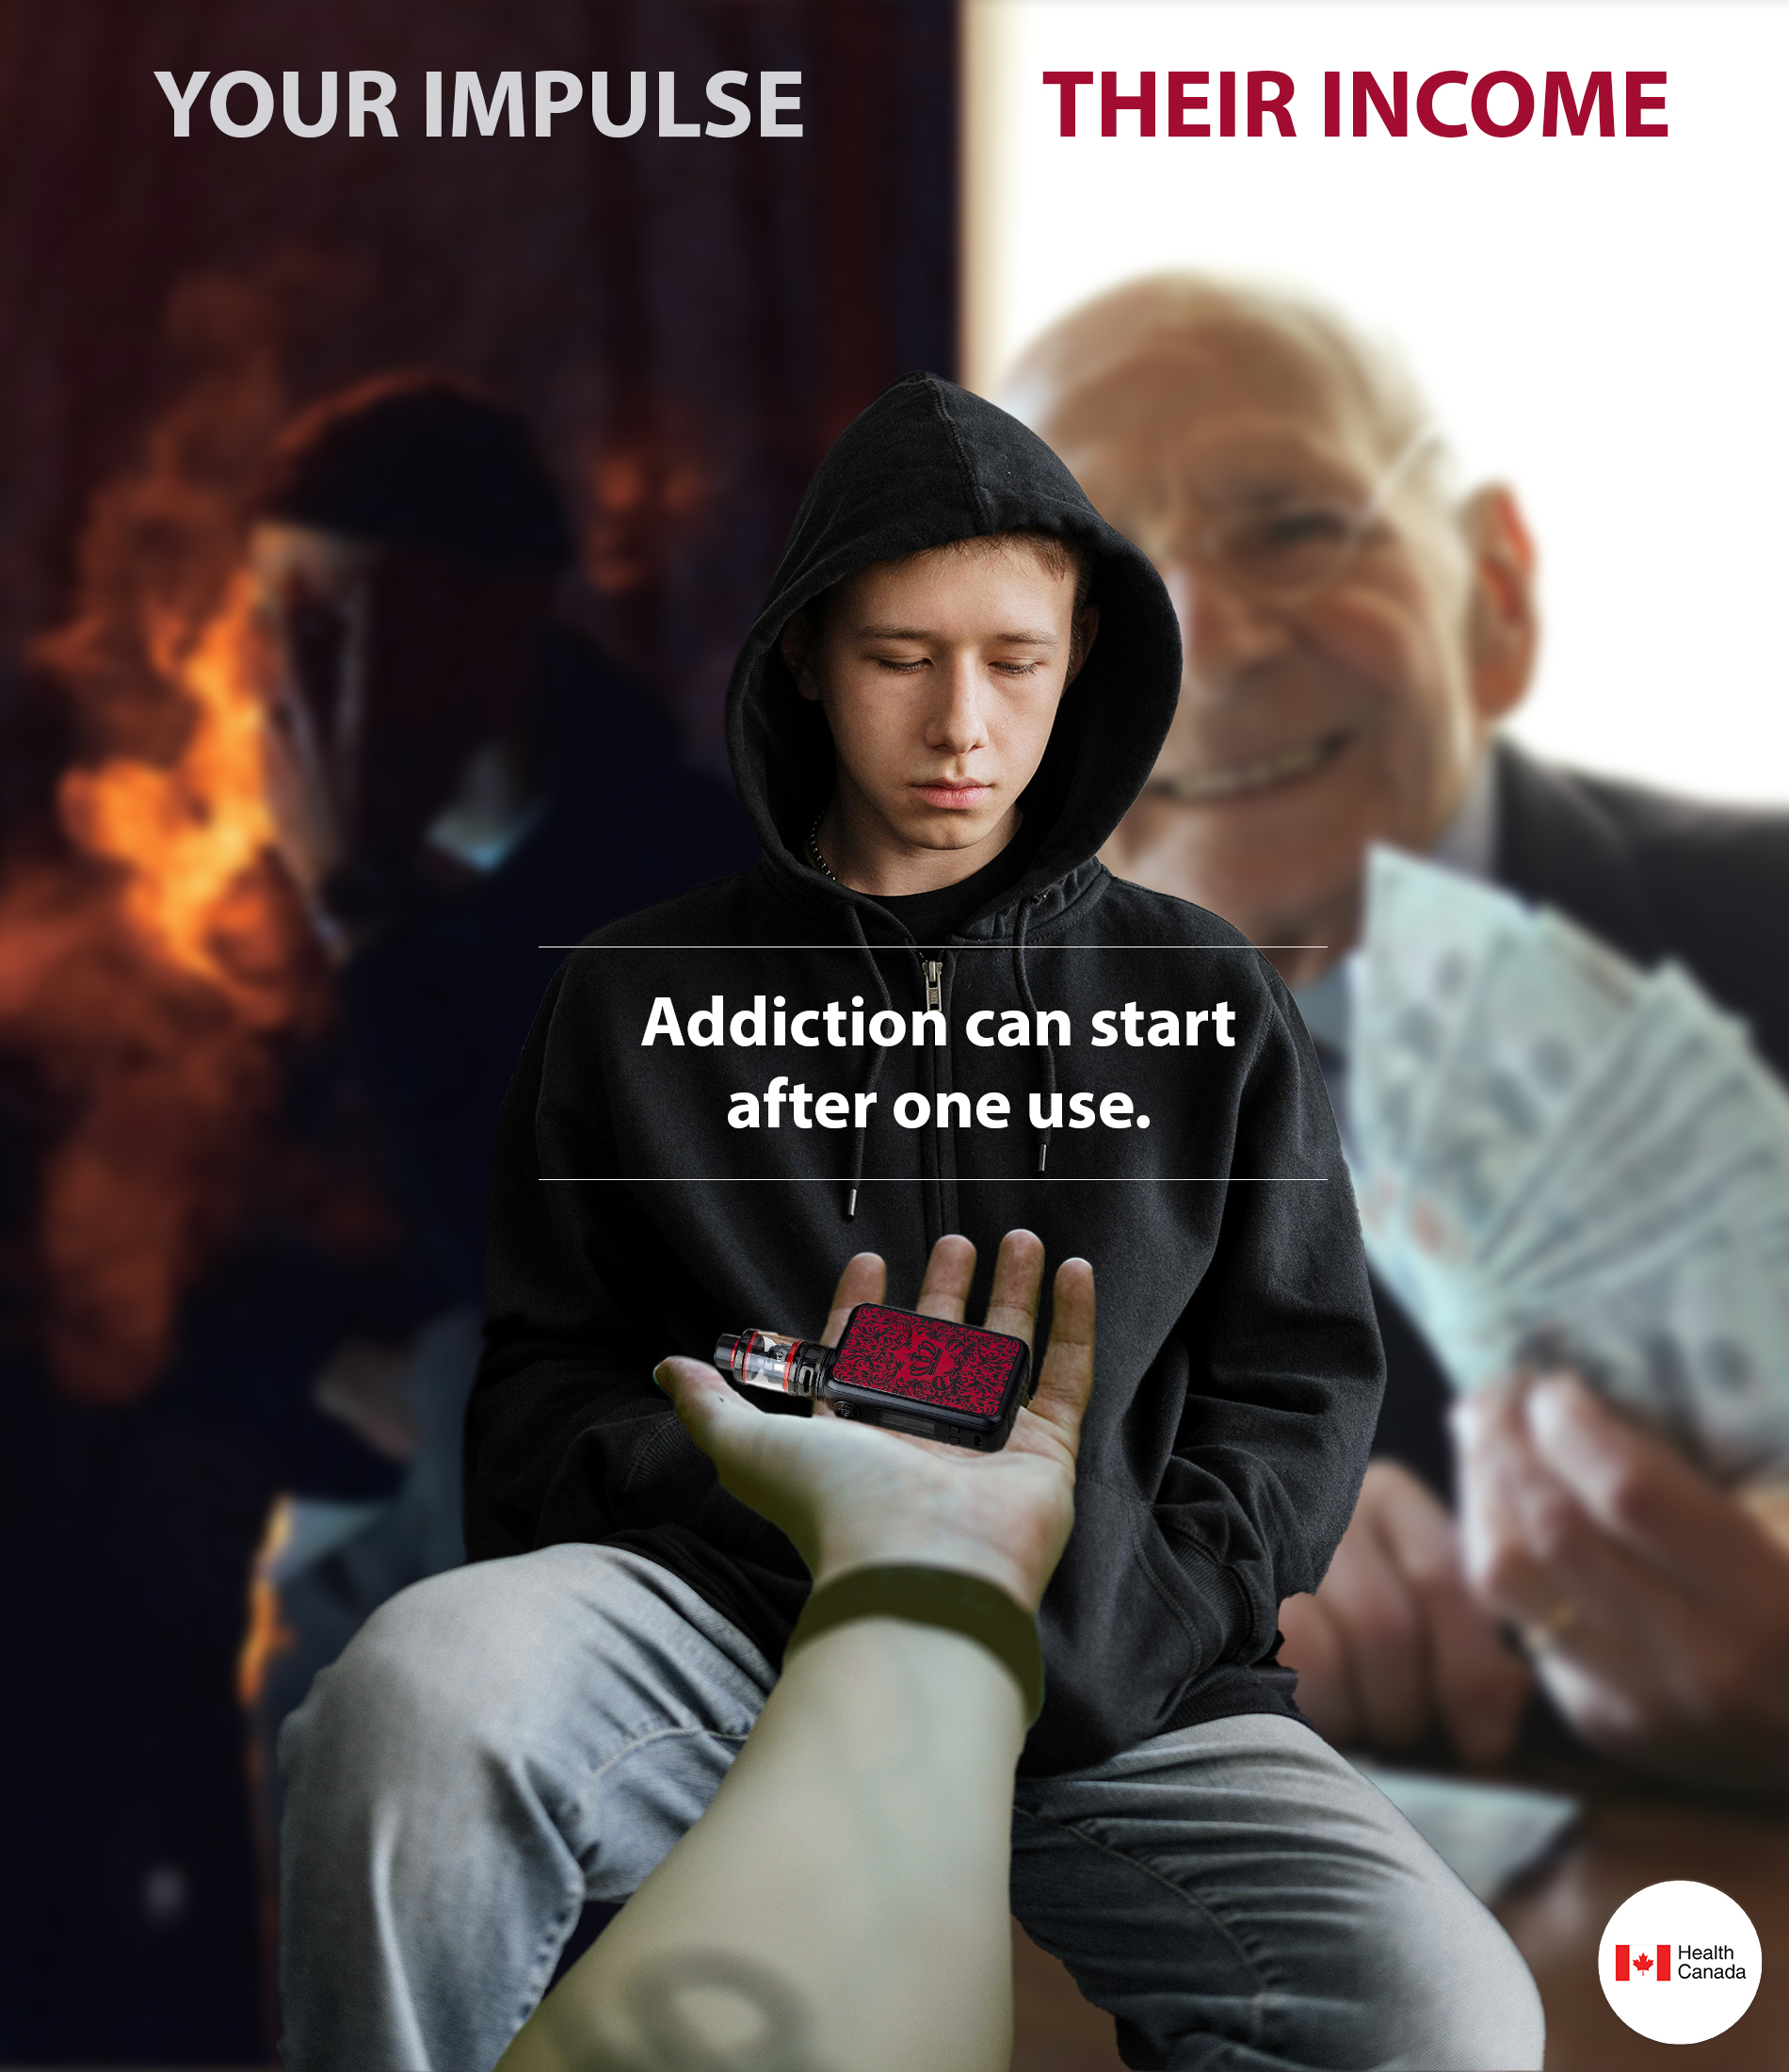
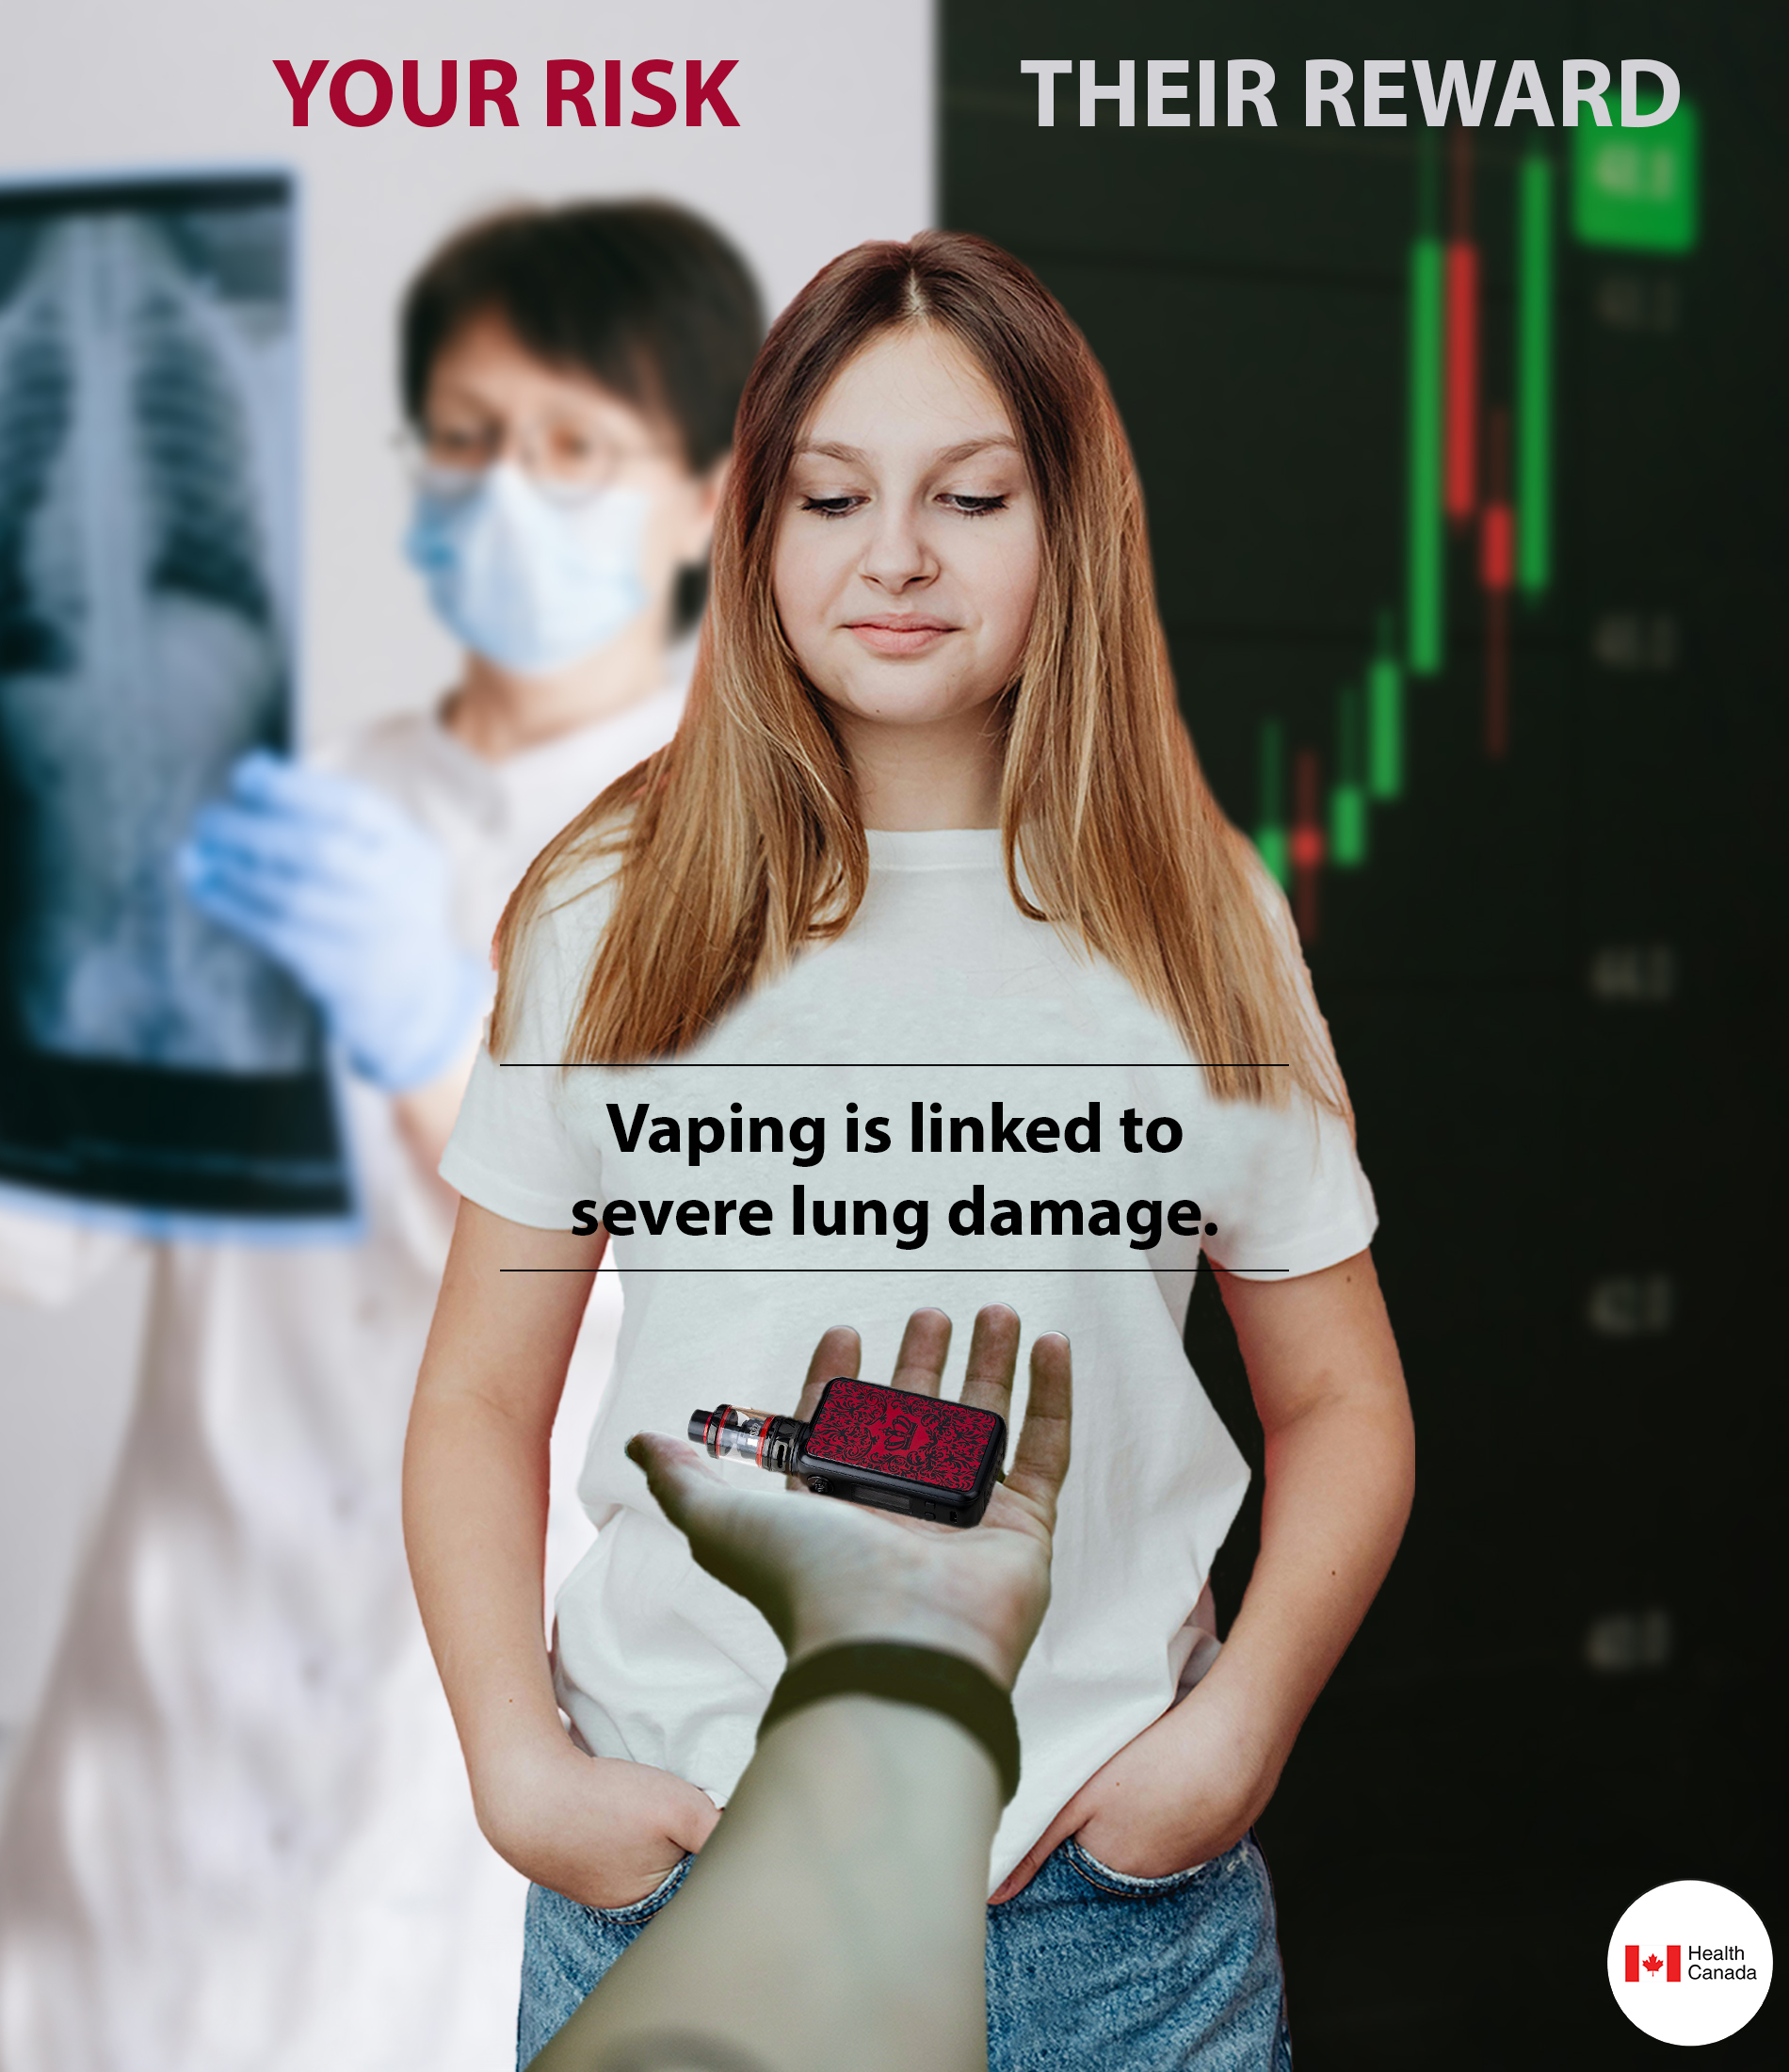
This project was a group assignment focused on creating an awareness campaign for Health Canada to inform teenagers about the effects of vaping.
The deliverables included three print advertisements and a supporting video. While this was a group project, I was responsible for creating the video and the campaign visuals included here.
The goal was to target teens directly and highlight how vaping companies take advantage of impulse decisions to drive profit.
Concept & Creative Direction
The campaign focuses on showing the contrast between the user and the companies behind vaping products.
- High contrast split visuals
- Bold messaging
- Clean layout
- Focus on impulse vs control
Process & Execution
I created both the video and print visuals, keeping a consistent style across the campaign.
The video follows a slow and steady pace using AI voice narration to deliver the message clearly.
Smoke overlay effects were added to simulate vaping due to the lack of usable stock footage.
Challenges
Due to legal restrictions, it was difficult to find footage of teens vaping.
I solved this by creating custom smoke effects to maintain the concept.
Balancing voice and music levels also required careful adjustment to keep the narration clear.
Outcome & Reflection
The campaign delivers a clear message with strong visual contrast and consistency.
I am most proud of the timing between transitions and how the music aligns with the visuals.
I improved my ability to balance audio levels and create effective visuals under constraints.
AI Promotional Video – Reebok Easytone
AI-generated promotional video exploring workflow and limitations.
AI Promotional Video – Reebok Easytone
College Assignment – Interactive Media Design, Fanshawe
College
Tools: After Effects, Grok Imagine, ChatGPT, Suno
Project Overview
This project was a group assignment focused on creating a short promotional video using AI-generated assets.
The concept focused on promoting Reebok Easytone shoes to men aged 35 to 50 with busy lifestyles.
I was responsible for creating the video using AI tools for both visuals and audio.
Concept & Creative Direction
The idea was to show how traditional footwear can lead to long-term physical strain while presenting Easytone as a better alternative.
- Fast-paced and energetic
- Workplace-focused lifestyle
- Before and after concept
- Focus on posture and health
Process & Execution
All visuals and audio were generated using AI tools including Grok Imagine, ChatGPT, and Suno.
Editing focused on timing cuts to match the music and keeping the video fast and engaging.
Most visual effects were generated through AI, with After Effects used to assemble the final video.
Challenges
AI tools like Grok often struggled to produce exactly what was requested and required multiple prompt adjustments.
Outcome & Reflection
The final video delivers a clear concept with clean transitions and strong pacing.
I am most proud of how well the transitions align with the beat of the music.
I improved my prompt writing and gained better control over transitions in video editing.
Custom Earbuds
Promotional website for a unique 3D earbud design.
Custom Earbuds – Interactive 3D Product Experience
College Assignment – Interactive Media Design
Tools: Cinema 4D, Redshift, Photoshop, HTML5, CSS3, JavaScript,
Model Viewer
Project Overview
This project involved designing fully original 3D earbuds and charging case, then building an interactive promotional webpage to showcase the product.
Starting from an initial sketch, I modeled the earbuds from scratch in Cinema 4D and rendered promotional imagery using Redshift. The final website integrates an interactive 3D viewer with hotspots that highlight product features on hover, along with supporting promotional visuals.
The goal was to combine product visualization, front-end development, and interactive user experience into one complete presentation.
Concept & Design Approach
The earbuds were completely original, beginning as a hand-drawn concept before being translated into 3D form. The focus was on creating a sleek, modern shape with soft curves to provide a comforatable grip betwee an index finger and thumb.
The promotional webpage was designed to:
- Highlight key features through interactive callouts
- Provide an X-ray comparison slider
- Present the product as a premium consumer device
The design emphasizes clarity, minimalism, and usability while allowing the 3D model to remain the central visual element.
Technical Execution
3D Modeling
All geometry was modeled from scratch in Cinema 4D. Polygon counts were carefully managed during production to prevent performance issues within the software and maintain smooth workflow efficiency.
Redshift was used for rendering promotional product visuals, allowing for realistic materials, controlled reflections, and clean lighting.
Web Integration
The final 3D model was exported as a GLB file and integrated into the webpage using Model Viewer.
Interactive hotspots were positioned using coordinate data from the model viewer. These hotspots trigger feature callouts that describe specific internal and external components of the earbuds.
The webpage was built using:
- HTML5 for structure
- CSS3 for layout and styling
- JavaScript for interactivity
Challenge & Problem Solving
The most time-consuming challenge involved positioning the interactive hotspots correctly.
Initially, the hotspots failed to appear in the correct location. I assumed the issue was related to JavaScript implementation, but after troubleshooting, I discovered the problem stemmed from the 3D model’s positioning in Cinema 4D.
Because the model was not centered within the 3D world space before export, the hotspot coordinates referenced an offset origin point. This caused them to render off-screen in empty space.
- I repositioned the model to the world center in Cinema 4D
- Re-exported the GLB file
- Re-applied the hotspot coordinates
The hotspots immediately aligned correctly.
This experience reinforced the importance of understanding how 3D coordinate systems translate into web environments and strengthened my debugging process by teaching me to evaluate both code and asset structure when troubleshooting.
Workflow
- Sketch initial product concept
- Model earbud and charging case in Cinema 4D
- Optimize geometry for efficient workflow
- Render promotional images in Redshift
- Export GLB model
- Build webpage layout and styling
- Implement interactive hotspots using coordinate mapping
- Debug positioning and export issues
Skills Demonstrated
- Original product modeling from concept sketch
- 3D-to-web pipeline integration
- GLB export workflow
- Coordinate-based hotspot placement
- Front-end development (HTML, CSS, JavaScript)
- Technical debugging across software environments
Reflection
This project strengthened my ability to move between 3D production and front-end implementation. It improved my understanding of how object positioning and coordinate systems affect web-based 3D interactivity.
If revisiting the project, I would further refine the UI design and enhance lighting realism in the rendered assets to elevate the product presentation.
Source
Burple Re-brand
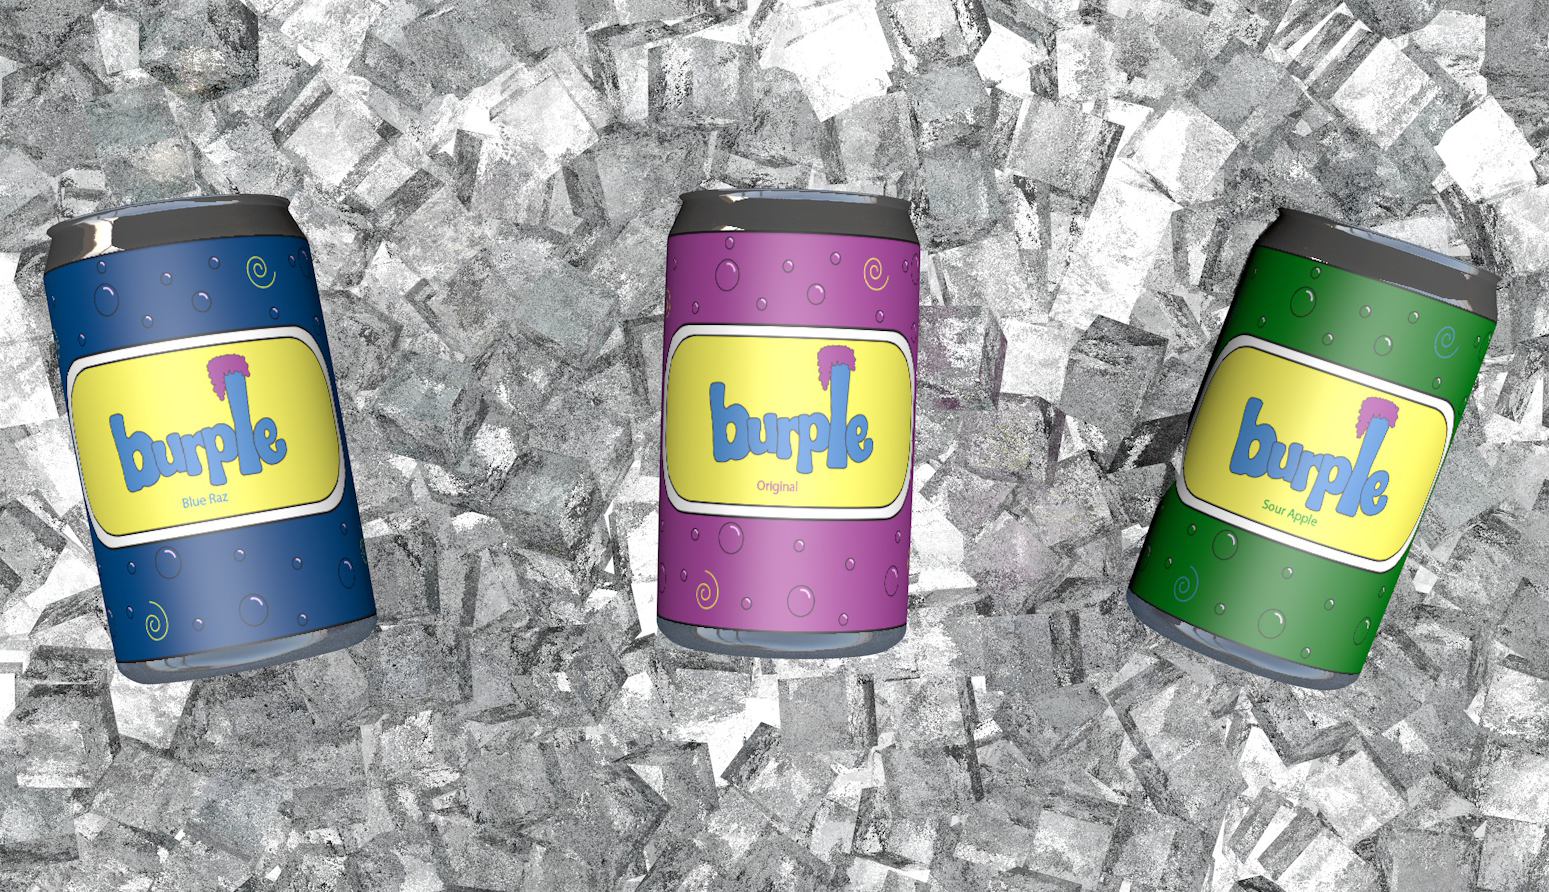
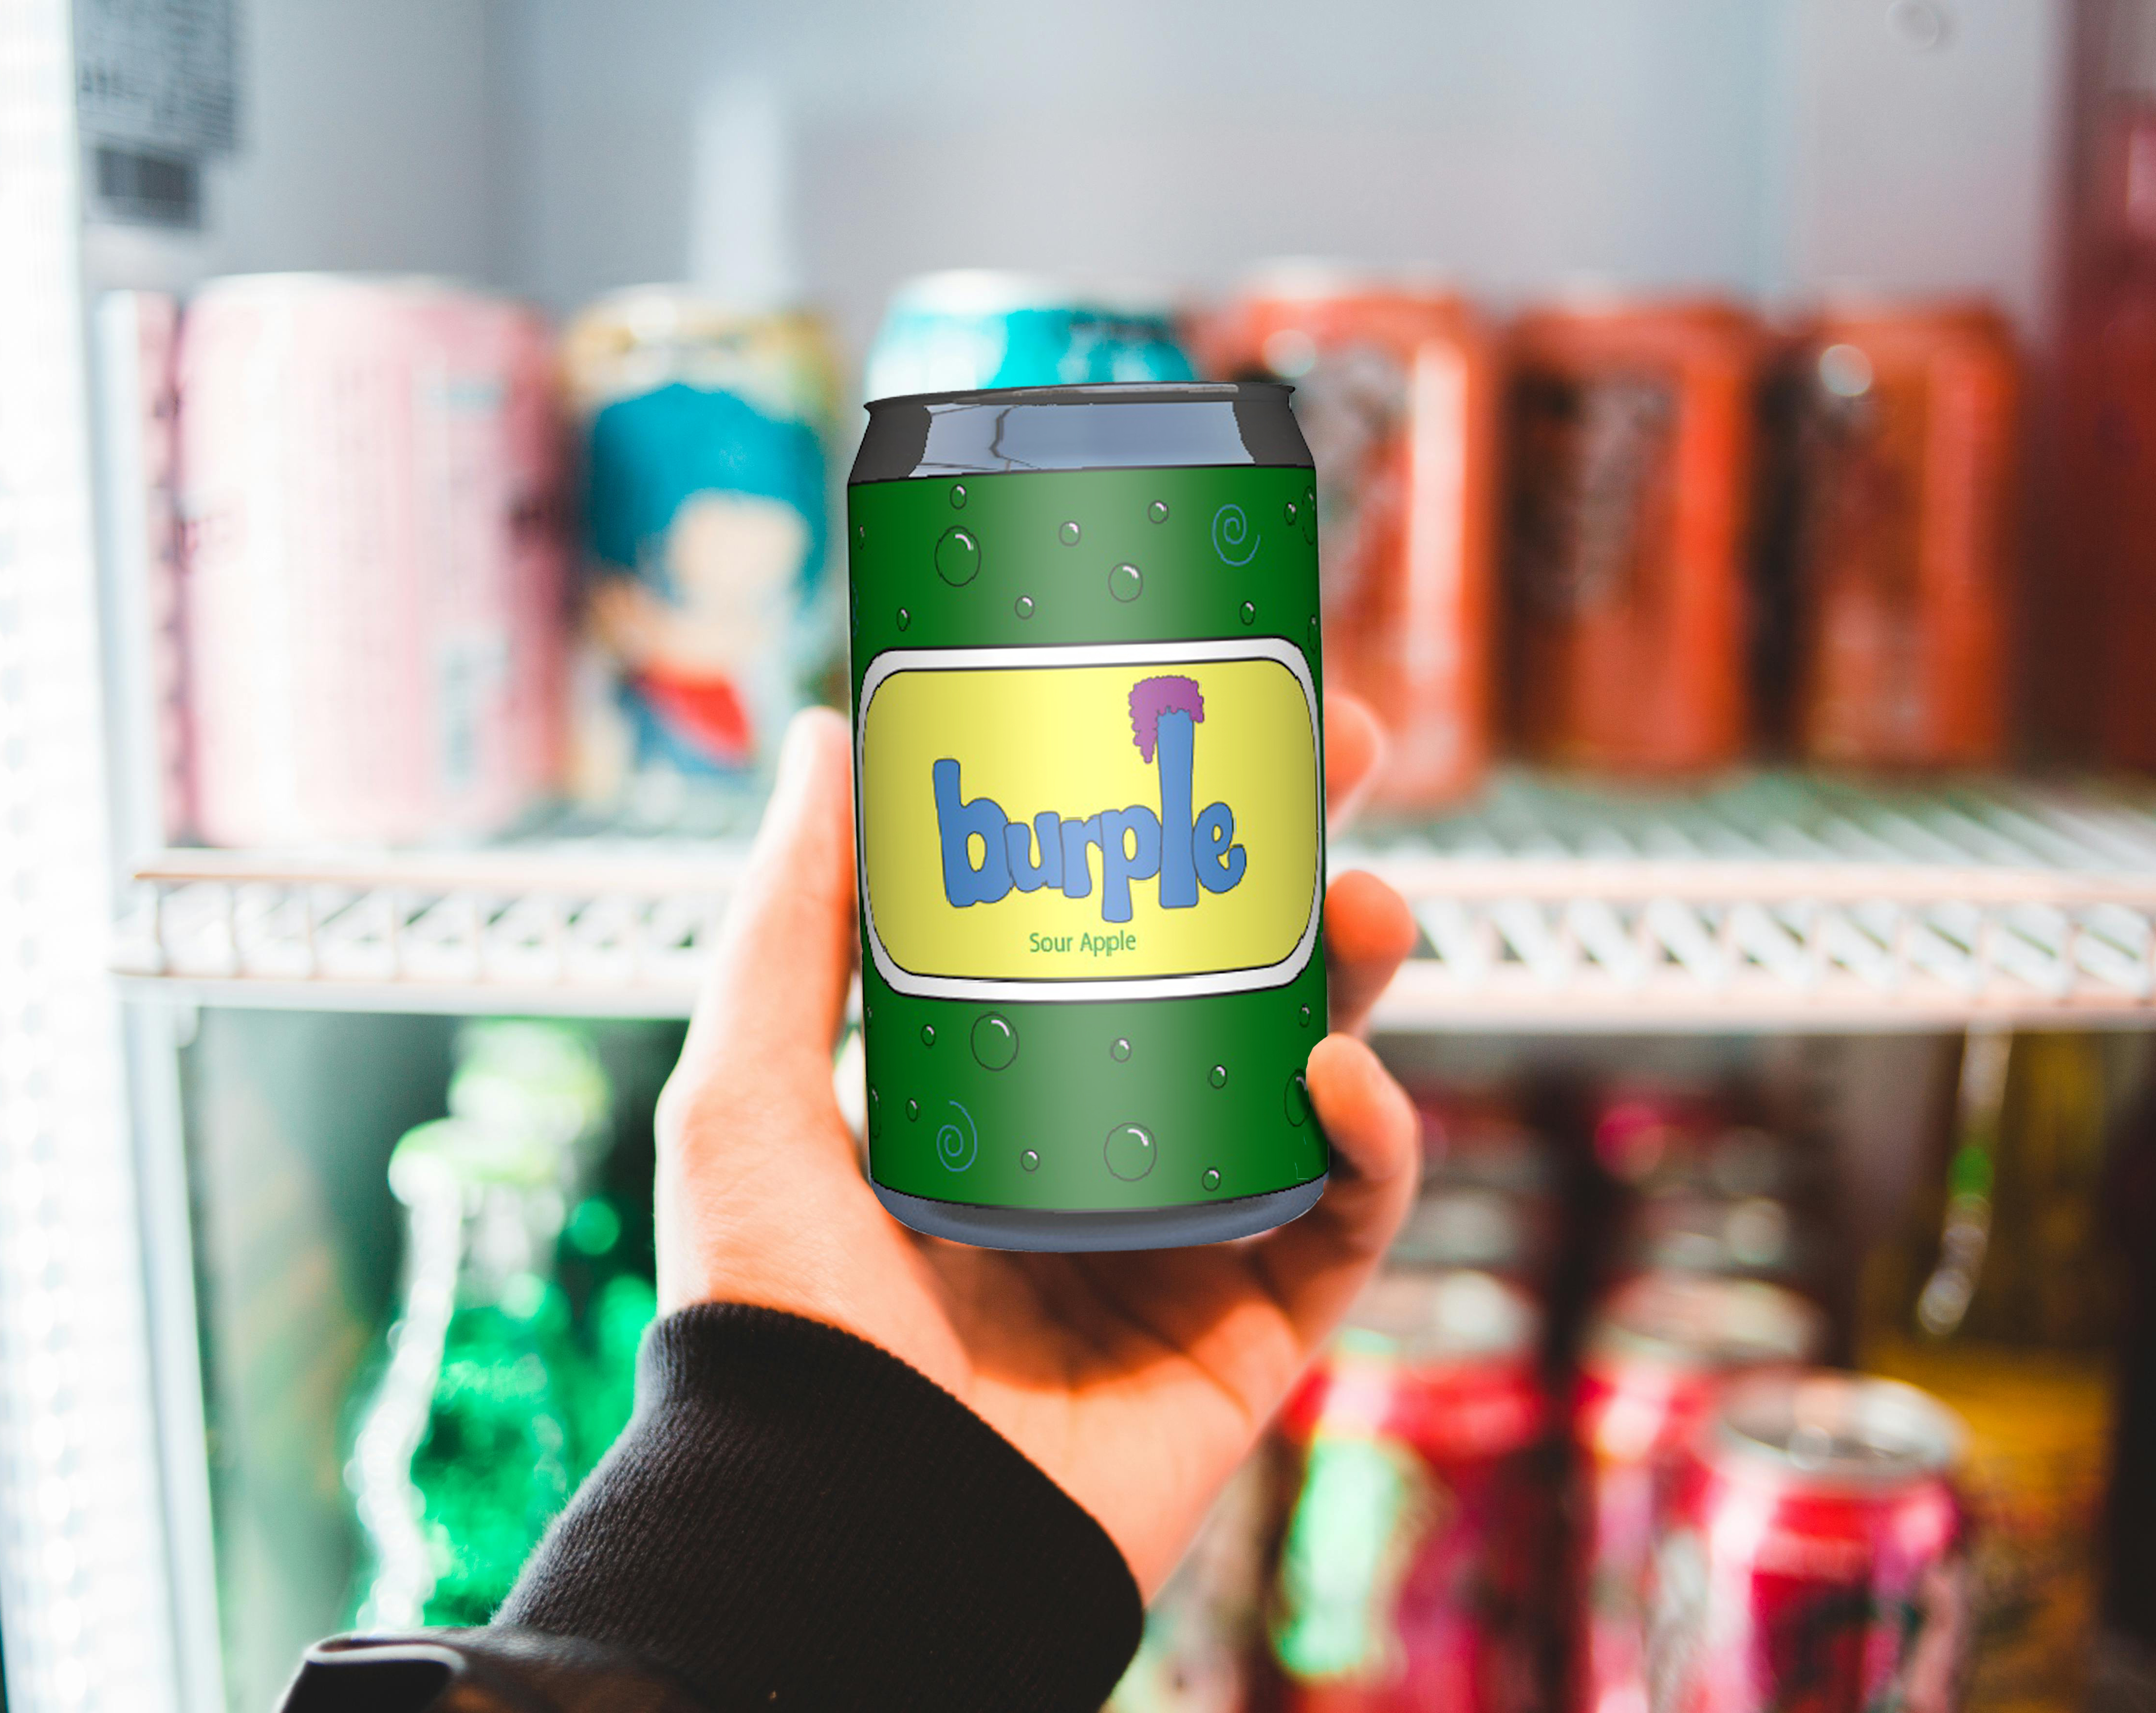
Promotional website for a soda rebrand.
Project Overview
This project involved a complete promotional rebrand of the beverage company “Burple.” I redesigned the brand identity from scratch, developed a new 3D can concept, and produced an animated promotional video supported by a dedicated marketing website.
The goal was to create a more playful and visually engaging brand identity while showcasing motion design, product visualization, and front-end presentation skills.
Brand & Creative Direction
The rebrand focused on a more energetic and playful tone. I redesigned the logo, packaging, and visual identity to feel bold and modern while maintaining a fun, consumer-friendly personality.
The 3D can was modeled entirely from scratch in Cinema 4D, with custom textures and branding elements created in Photoshop and illustrator to represent:
- Bright, playful color choices
- Clean typography
- Smooth product curvature
- Bold logo placement
Motion & Production Process
The majority of the promo was created directly inside Cinema 4D using keyframe animation and camera movement to create engaging product reveals and motion-driven sequences.
After rendering in Redshift, the footage was brought into After Effects for music integration, timing refinement, compositing adjustments, and final export.
Lighting & Realism Challenge
Early test renders felt flat and artificial due to insufficient lighting, poor light placement, lack of reflective highlights, and minimal surface variation.
By expanding the light rig, repositioning lights for controlled highlights and shadow contrast, introducing reflections, adding subtle roughness variations, and refining Redshift material properties, the final renders achieved significantly greater depth and realism.
Workflow
- Brand concept development
- Logo and packaging design in Photoshop and illustrator
- 3D can modeling in Cinema 4D
- Material and texture creation
- Lighting experimentation and refinement
- Product animation and camera choreography
- Rendering in Redshift
- Music and final edits in After Effects
- Website build and content integration
Skills Demonstrated
- Full brand redesign and packaging development
- 3D product modeling from scratch
- Product lighting techniques in Redshift
- Motion design for promotional video
- Camera choreography and reveal animation
- Material refinement and surface detailing
- Video editing and timing integration
- Web presentation of marketing assets
Reflection
This project significantly improved my understanding of 3D lighting and material realism. By identifying why early renders lacked depth and refining the lighting setup, I elevated the final visuals to a much higher level.
If revisiting the project, I would enhance micro-details in textures and explore more advanced compositing techniques to push realism and polish even further.
Source
Testimonials
Coming Soon
Coming Soon